 Primer
 Cheek Enhancer
 Baked Illuminator
 Setting Powder
 Matte Foundation
 HD Cover Compact Powder
 Star Dust
 Concealer

 Soft Satin Matte Lipstick
 Stunning Longstay Liquid Lip
 Flattering Nude Lipstick
 Luxe Creme Lipstick
 Lip Contour Lip Liner
 Diamond Rush
 Eye Liner
 Eyebrow
 Eye Shadow
 Mascara
How to Apply Face Illuminator Like A Pro – Step-by-Step Guide
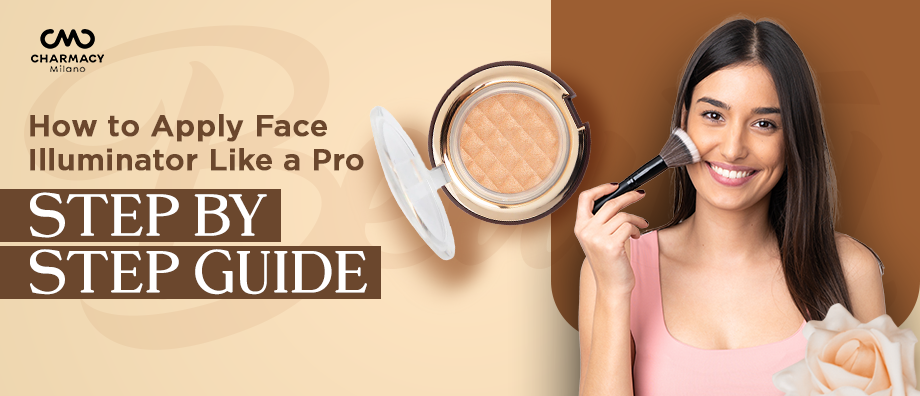
Do you want the gorgeous glow that all the best makeup artists vouch for? A face illuminator (a.k.a. highlighter) is the secret to achieving a radiant, lit-from-within look. Learn how to apply a baked illuminator and how illuminator will improve your makeup game, regardless of your level of experience in illuminator makeup game. This blog guide will help you to understand how to use an illuminator (highlighter) like a pro – from prepping your skin to the final blinding glow – all while focusing on a baked formula for maximum radiance. Let’s get glowing!
What Is a Face Illuminator (Highlighter) and Why Use One?
A face illuminator is a type of makeup product that adds shimmer and shine to your face to draw attention to your best features. Illuminators and highlighters are very similar in everyday life; they both increase the radiance of your skin. The primary distinction lies in application: illuminators can also refer to products (usually cream or liquid) that you apply all over for a subtle glow or mix into your base, whereas highlighters are usually used to apply concentrated shimmer to particular high points of the face. However, don't get caught up in the jargon; the objective remains the same: a youthful, dewy glow that highlights your features.
Illuminators have become a part in makeup routines because they instantly lift and brighten the face, giving the illusion of healthy, well-rested skin. A touch of illuminator can accentuate your cheekbones, make your eyes look more awake, and even make your lips appear fuller with a dab on the cupid’s bow. No wonder the face highlighter trend has become so popular in beauty industry an illuminator is your best friend if you want to transform your appearance from flat to fabulous.
Why Choose a Baked Illuminator?
Perhaps you've heard the term "baked illuminator" and wondered what it means. Initially in the form of creams, baked makeup products are baked until they become smooth and silky powders, (usually on terracotta tiles). This process gives baked highlighters a uniquely soft, ultra-blendable texture and intense pigmentation. Put another way, you get the best of both worlds: the easy application of a powder and the rich colour payoff of a cream. For instance, Charmacy Milano's CMC Baked Illuminator has a gorgeous chrome sheen and a smooth frost finish thanks to the addition of ultra-reflective metallic pearls. Because this type of formula is so lightweight and simple to use, even beginners won't have to worry about harsh streaks or accuracy.
Caption: Charmacy Milano's CMC Baked Illuminator is a smooth-textured baked powder highlighter. The skin glows brightly without any chunky glitter thanks to its ultra-reflective pearl pigments. This type of baked illuminator is ideal for both beginners and experts due to its ultra-blendability and ease of control.

Another big advantage of baked illuminators is their buildable intensity. Because the formula is finely milled and not overly dusty, you can start with a subtle sheen and layer on more for a blinding glow without it looking cakey. Professionals love baked highlighters for their versatility: use them dry for a soft lit-from-within glow or apply with a damp brush for an intensified shine. Additionally, the powder-baked formula usually lasts longer on the skin. A baked illuminator is the best option if you're looking for a face highlighter that's easy to use and gives you a lot of radiance.
Step-by-Step Guide: Applying Face Illuminator Like A Pro
Ready to shine? Follow these step-by-step instructions to apply your face illuminator like a pro. We’ll cover everything from skin prep to last finishing touch. (Pro tip: Keep your baked highlighter and a fluffy brush handy!)
-
Prep Your Skin: Any makeup artist will tell you, that proper skin preparation is the first step towards flawless makeup. After cleansing and moisturising your face, apply your go-to foundation makeup. Don't forgot primer and SPF during the day. A well-prepped canvas ensures the illuminator sits nicely instead of clinging to dry patches. Apply your foundation and concealer as necessary and set your base lightly if you use powder. (Illuminator looks best on a smooth, even-toned base – think of it as the finishing touch, not a cover-up product.) Proper hydration and base makeup will help the highlighter glide on and glow, rather than accentuate imperfections.
-
Choose the Right Illuminator: Not all illuminators are one-size-fits-all. To get a pro-level glow, you need to pick a product and shade that works well for you. First, decide on the formula – here we focus on a powder illuminator (like the CMC Baked Illuminator), which is great for all skin types. Next, choose a shade that complements your skin tone. For example, champagne or pearly illuminators work beautifully on fair or cool undertones, while warm undertones glow with golden or rose-gold hues. Deeper skin tones can opt for rich golds or bronzy highlighters that add a warm, sun-kissed radiance. The idea is to enhance your natural complexion: the best illuminator for Indian skin (typically medium to tan with warm undertones) is often a gold or peachy shade that won’t look ashy but instead brings out a rich glow.
In fact, the Charmacy Milano CMC Baked Illuminator comes in four gorgeous shades designed to suit all Indian skin tones – so you’re sure to find your perfect match. Always look for an illuminator makeup product that is ultra-blendable and finely milled, as this will be the best illuminator for all skin types and textures (it should give you glow without emphasizing pores or fine lines). If you’re a beginner, start with a universally flattering shade like champagne or soft gold, then branch out as you get comfortable.
Caption: Swatches of a baked illuminator in different shades. Notice how Shade 02 (rose gold), 01 (champagne), and 03 (ice white) reflect light differently. Choosing the right shade for your skin tone is key – champagne and gold tones are universally flattering, while rose gold and bronze can add warmth to deeper complexions.

-
Select Your Tool: The tool you use can make a big difference in how your illuminator looks on the skin. For a soft, diffused glow, use a fluffy brush (like a fan brush or a tapered highlighting brush). This will lightly scatter the powder for that lit-from-within effect. If you want a more intense shine, choose a denser brush or even your fingertips. Using your finger to tap on the product can lay down a strong metallic highlight (great for the tops of cheekbones on a glam night out). Some professionals also use a damp beauty sponge to press highlighter onto the skin for a melted-in glow. As a rule of thumb, fluffy brush = subtle glow, dense brush/finger = high impact. Feel free to experiment – just remember to tap off excess product from your brush before applying to avoid any harsh streaks.
-
Apply to the High Points of the Face: Now for the fun part – applying your illuminator! Lightly dip your brush (or finger) into the product. Tap or sweep it on the high points of your face – these are the areas where light naturally hits, and you want to accentuate. Focus on the cheekbones (the top outer part of your cheeks, just below the eye area). Sweep the highlighter along the cheekbone, going up toward the temple in a C-shape. Next, dab a bit on your brow bones (the area right under the arch of your eyebrows) to lift the eyes. A touch on the bridge of your nose will give a subtle sculpted effect – just a light line down the center, stopping before the tip (you can put a tiny dot on the tip of the nose if you like a button-like glow, but use sparingly). Don’t forget the cupid’s bow – that little dip above your upper lip – a hint of illuminator here makes your lips look plumper and more defined. Blend each area gently so the sheen looks natural and melds into your skin. The key is to mimic where the light would hit your face. Look in different lighting and ensure you’ve got a nice subtle shine and no obvious unblended lines. (Avoid applying highlighter on areas with lots of texture, like active breakouts or very large pores, because shimmer can draw attention to those. Instead, highlight just above or around those areas.)
-
Blend and Build Up Intensity: Once you’ve placed the illuminator on your key spots, take a moment to blend. Use clean fingers or a clean fluffy brush to buff the edges of the highlighted areas. You want a gradient glow that looks seamless – no harsh lines where the highlighter starts or stops. Apply a little more illuminator and blend again if you feel like you need more oomph. The buildability of a baked illuminator is one of its advantages; you can start with a natural sheen and add one or two more layers for a strong shine without the appearance of patchiness. Before you pick up the product, you can even mist your brush with a setting spray to create a blinding highlight (the kind that's visible from space!). This damp application will amplify the glow of the illuminator. As you build, keep checking your appearance in the mirror. A pro tip is to tilt your face so you can see your reflection; the high points should be beautifully lit, but when you face forward, you shouldn't see any product stripes. Use a small amount of your foundation brush or sponge to diffuse it if it appears too intense. Remember, it’s easier to add more than to remove excess, so build gradually.
-
Set and Finish (Make It Last): Now that you’ve achieved the perfect glow, you’ll want it to stay put. If you have normal to dry skin, a spritz of setting spray over your whole face will lock in your makeup and prevent the illuminator from fading, all while keeping that dewy finish. For those with oily skin or if you’re in a humid climate, you might also lightly dust a translucent powder on areas prone to creasing (like around the eyes) – but be careful not to matte out your newly applied highlight. In fact, a great trick for oily skin is to set the areas around the highlighter, but leave the highlighted points free of powder, or use a very fine setting powder if needed. The CMC Baked Illuminator is quite long-lasting on its own (it adheres well to the skin), but a setting spray will ensure your face illuminator stays vibrant from day to night. Take one last look in different lighting (natural light if possible) to make sure everything is blended and glowing. Voilà – you’ve applied your illuminator like a pro!
Pro Tips and Tricks for a Flawless Glow
Even the simplest makeup products have their hacks and tricks. Here are some extra pro tips to help you get the most out of your illuminator and avoid common mistakes:
-
Less Is More (at First): Always begin with a gentle touch. Building up the glow is simpler than reducing it. Applying too much illuminator at once is a common mistake made by beginners, which can result in an excessively metallic or shiny appearance. Keep in mind that you can add layers for a party and be subtle during the day. For a natural look, a little glow goes a long way, and you can always add that second or third layer for extra dazzle.
-
Use an Illuminator Makeup Base for All-Over Radiance: Do you want to appear to be glowing from the inside? Apply a liquid illuminator into your foundation or apply an illuminator lotion as a base under your makeup. This technique produces a soft-focus glow, or diffuse luminosity, under your foundation. Then you can proceed to highlight specific areas with your baked highlighter on top. Applying a liquid illuminator before foundation gives a subtle overall sheen, while applying it after gives a more targeted pop. Try out a few to determine which you like best. Many pros use this combination to achieve that professional glow.
-
Dampen for Drama: Wet your brush if you want your highlight to stand out, such as for a night out, bridal makeup, or photo shoots. Spray a bit of setting spray or water on your brush, dip into the baked illuminator, and then apply. The moisture intensifies the pigment and shine, almost giving a wet-look gleam. This technique can turn even the best face highlighter into an ultra-best face highlighter by taking the shine to the next level! Just be sure to blend out the edges since a wet application can leave a sharper line.
-
Multi-Use Magic: You can use your illuminator for more than just your face's high points. You can tap a bit on the inner corners of your eyes to brighten them (a classic trick to look more awake).Sweep some on your collarbones or shoulders if they’re exposed – this looks amazing for events or photography, giving your body a subtle sheen to match your glowing face. You can even use a shimmery illuminator as a quick eyeshadow – just blend it on your lids for a simple, glistening eye look that ties together with your highlighted cheeks.
-
Mind Your Skin Type: If you have oily or textured skin, choose a finely milled illuminator and apply strategically. The CMC Baked Illuminator, for instance, has ultra-reflective pearl pigments that give glow without chunky glitter, so it won’t emphasize texture as much. Still, it’s wise to avoid putting highlighter on areas with active acne or very large pores. Also, as mentioned, set the areas around it if you tend to get oily, to prevent any creasing or moving of the product. If your skin is very dry, make sure you’ve moisturized well; you could even opt for a liquid illuminator or balm for a more hydrating glow on no-makeup days, and save the baked powder for on top of foundation.
-
Blend, Blend, Blend: The difference between a professional-looking highlight and an amateur one often comes down to blending. After applying, take a clean fluffy brush and do small circular motions at the edges of your highlighter. This softens any hard lines and ensures the illuminator melts into your skin. You’ll know you’ve blended enough when the glow looks like it could be your skin’s natural radiance and not a stripe of makeup. If you ever do apply a bit too much, don’t panic – just take your damp makeup sponge (with a touch of leftover foundation on it) and pat over the area gently. This will diffuse the shimmer and tone it down.
By following these tips and the step-by-step guide above, you’ll avoid common mistakes (like unblended streaks or the “disco ball” effect) and instead achieve a beautiful, professional glow every time.
Glow-Up Conclusion + Our Recommended Illuminator
You’ve now got all the knowledge you need to apply a face illuminator like a pro! With the right preparation, the perfect product, and proper technique, even a beginner can get that red-carpet glow. The key takeaways: choose an illuminator shade that matches your skin tone, place it on the right spots, and blend it out for a seamless sheen. Makeup is all about experimentation, so don’t be afraid to play around with intensity and application methods until you find your signature glow style.
And speaking of the perfect product – if you’re looking for a high-quality illuminator to add to your kit, we highly recommend the CMC Baked Illuminator by Charmacy World. It’s ultra-blendable, buildable, and suits all skin types (especially formulated as one of the best illuminators for Indian skin tones with its flattering shades). This baked highlighter delivers a radiant glow that can go from subtle to blinding, and it’s beginner-friendly while offering professional results. Don’t just take our word for it – try it yourself and see the difference a great illuminator can make in your look!
Ready to shine? Elevate your makeup game and get that glow on – check out the CMC Baked Illuminator on Charmacy World and let your radiance do the talking. Here’s to a beautifully illuminated face that lights up every room you enter!